Easiest Way to Set Up a VPN on Your Raspberry Pi: A Step-by-Step Tutorial

Setting up a VPN on your Raspberry Pi is like giving your home network a secret tunnel for safe internet browsing. Whether you want to access your home files from a coffee shop or keep your data private on public Wi-Fi, a Raspberry Pi VPN server is a budget-friendly, powerful solution. The best part? You don’t need to be a tech wizard to make it happen. With tools like PiVPN, the process is straightforward, and I’m here to walk you through every step. Let’s turn your Raspberry Pi into a VPN powerhouse and make browsing safer and more private.
This guide focuses on the easiest way to set up a VPN on your Raspberry Pi using PiVPN, a tool designed to simplify the installation of OpenVPN or WireGuard. We’ll cover everything from preparing your Pi to connecting your devices, all in plain language. Ready to take control of your online privacy? Let’s dive in!
Why Use a Raspberry Pi for a VPN?
A Raspberry Pi is a tiny, affordable computer that’s perfect for projects like hosting a VPN server. It’s energy-efficient, runs 24/7 without breaking the bank, and can securely connect you to your home network from anywhere. VPN is very useful. Imagine streaming F1 or other shows from your home media server while traveling or accessing your files without worrying about hackers on public Wi-Fi. That’s the power of a Raspberry Pi VPN.
PiVPN makes this setup a breeze by automating the complex parts of installing and configuring a VPN. It supports OpenVPN, a widely compatible and secure protocol, and WireGuard, which is faster and newer. Both are great, but we’ll focus on OpenVPN for its universal support across devices like phones, laptops, and tablets. By the end, you’ll have a VPN server that’s easy to manage and keeps your data safe.
What You’ll Need to Get Started
Before we jump into the setup, let’s gather the essentials. Think of this as prepping your toolbox for a DIY project. Having everything ready ensures a smooth process without frustrating pauses to hunt for missing pieces.
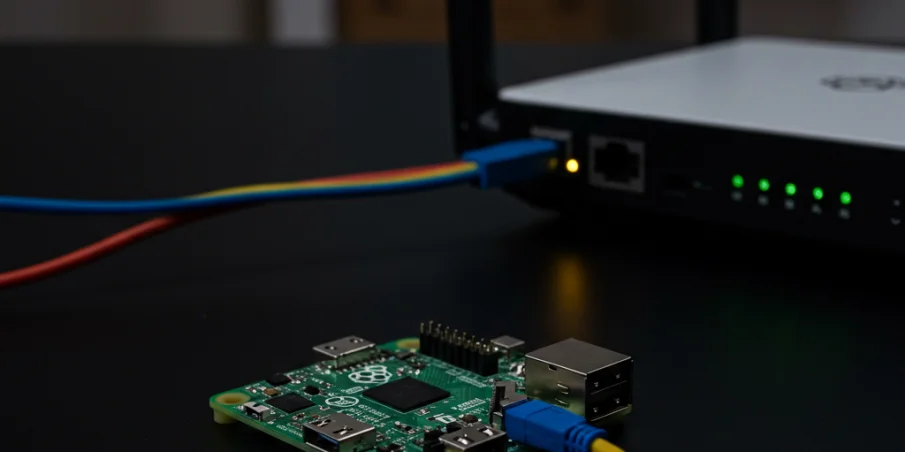
First, you’ll need a Raspberry Pi. Any model from the Pi 3 or newer works well, but a Raspberry Pi 4 or 5 offers better performance for handling multiple VPN connections. You’ll also need a microSD card (at least 16GB) with Raspberry Pi OS installed. The Lite version is fine since we don’t need a desktop interface for a VPN server. A stable power supply, an Ethernet cable for a reliable connection, and a way to access the Pi (like a computer with SSH) are also must-haves.
For software, we’ll use PiVPN, which streamlines the VPN setup. You’ll need an internet connection and access to your router’s settings to configure port forwarding. Finally, grab a cup of coffee or tea—this process is straightforward but takes about 30 minutes. Got everything? Great, let’s set up your Pi!
Preparing Your Raspberry Pi
Before we install PiVPN, we need to get your Raspberry Pi ready. This step is like laying a solid foundation for a house—it ensures everything runs smoothly later. If your Pi is already set up with Raspberry Pi OS, you can skip to updating the system. If not, let’s start from scratch.
Installing Raspberry Pi OS
Download the latest Raspberry Pi OS Lite from the Raspberry Pi Foundation’s website. The Lite version is perfect for a VPN server since it’s lightweight and doesn’t include unnecessary graphical software. Use a tool like Balena Etcher to flash the OS onto your microSD card. Insert the card into your Pi, connect it to your router with an Ethernet cable, and power it on.
To access the Pi, enable SSH during setup or by adding an empty file named ssh to the root of the microSD card’s boot partition. Connect to the Pi from another computer using an SSH client like PuTTY (Windows) or Terminal (Mac/Linux). The default login is username pi and password raspberry. Change the password immediately with the passwd command for security.
Updating the System
Once you’re logged in, update the Pi to ensure it’s running the latest software. This step prevents compatibility issues during the VPN setup. Run these commands in the terminal:
sudo apt update
sudo apt upgrade -y
This process might take a few minutes, depending on your internet speed. While it’s running, double-check that your Pi is connected to the internet via Ethernet for a stable connection. If you’re using Wi-Fi, ensure it’s reliable, but Ethernet is preferred for a server that’s always on.
Setting a Static IP Address
Your Raspberry Pi needs a consistent IP address on your home network so devices can always find it. Without a static IP, your router might assign a new address each time the Pi restarts, breaking your VPN. To set a static IP, find your Pi’s current IP address by typing:
hostname -I
Note the IP address (e.g., 192.168.1.100). Next, check your router’s IP range (often 192.168.1.100 to 192.168.1.199) by logging into its admin panel, usually at 192.168.1.1. Choose an IP outside this range, like 192.168.1.250, for your Pi.
Edit the Pi’s network configuration by running:
sudo nano /etc/dhcpcd.conf
Add these lines at the bottom, replacing 192.168.1.250 with your chosen IP and 192.168.1.1 with your router’s IP:
interface eth0
static ip_address=192.168.1.250/24
static routers=192.168.1.1
static domain_name_servers=8.8.8.8 8.8.4.4
Save the file with Ctrl+O, press Enter, then exit with Ctrl+X. Reboot the Pi with sudo reboot to apply the changes. Reconnect via SSH using the new static IP. Now your Pi is ready for the VPN setup!
Installing PiVPN
With your Raspberry Pi prepped, it’s time to install PiVPN—the star of this show. PiVPN simplifies the process of setting up a VPN server, making it feel like a guided tour rather than a tech maze. Let’s get it installed and configured step by step.
Downloading and Running PiVPN
PiVPN is installed via a single command that downloads and runs its setup script. In your Pi’s terminal, type:
curl -L https://install.pivpn.io | bash
This command grabs the latest PiVPN installer from the internet and starts the setup wizard. The process is mostly automated, but you’ll need to make a few choices along the way. Don’t worry—I’ll guide you through each one.
Configuring PiVPN
The PiVPN installer will ask you a series of questions to tailor the VPN to your needs. Here’s what to expect and how to respond:
- Static IP Confirmation: The installer will detect your static IP (e.g.,
192.168.1.250). Confirm it’s correct or set it now if you skipped the earlier step. A static IP is crucial for consistent access. - Protocol Choice: Choose between OpenVPN and WireGuard. Select OpenVPN for this tutorial because it’s widely supported across devices and reliable for most users. WireGuard is faster but less universal.
- Port Selection: Stick with the default port,
1194(UDP), unless you have a specific reason to change it. This port will need to be forwarded on your router later. - DNS Provider: Pick a DNS provider like Google (
8.8.8.8) or Cloudflare (1.1.1.1). This handles name resolution for your VPN clients. Google is a safe, reliable choice. - Public IP or DNS: If you have a static public IP from your ISP, enter it. Most home users have dynamic IPs, so select a dynamic DNS service like No-IP or DuckDNS. Sign up for a free account with one of these services and enter your hostname (e.g.,
myvpn.duckdns.org). This ensures your VPN is accessible even if your home IP changes. - Security Settings: Accept the default encryption settings (2048-bit for OpenVPN). These provide strong security without slowing down your Pi.
- Unattended Upgrades: Enable this to keep your Pi’s security patches up to date automatically. It’s a set-it-and-forget-it feature for peace of mind.
The installer will take a few minutes to download packages, generate encryption keys, and configure the VPN server. Once it’s done, you’ll see a confirmation message. Reboot your Pi with sudo reboot to finalize the setup.
Setting Up Port Forwarding on Your Router
Your VPN server is now running on the Pi, but it’s like a hidden gem—devices outside your home network can’t find it yet. To make it accessible, you need to configure port forwarding on your router. This tells your router to send incoming VPN traffic to your Pi.
Log into your router’s admin panel by entering its IP address (usually 192.168.1.1) in a web browser. Check your router’s manual or sticker for the login credentials, often admin and a default password like password (change this for security!).
Navigate to the port forwarding section, sometimes called “Virtual Server” or “Port Mapping.” Create a new rule with these settings:
- External Port:
1194(or the port you chose in PiVPN). - Internal IP: Your Pi’s static IP (e.g.,
192.168.1.250). - Internal Port:
1194. - Protocol: UDP.
Save the settings and restart your router if required. To test if the port is open, use an online tool like CanYouSeeMe.org from a device outside your network, entering port 1194. If it’s open, you’re ready to connect devices to your VPN!
Adding Client Devices to Your VPN
Your VPN server is up and running, but it’s not much use without devices connected to it. Let’s create client profiles so your phone, laptop, or tablet can securely access the VPN. This is where the magic happens—you’ll soon be browsing safely from anywhere.
Creating a Client Profile
On your Pi, open the terminal and run:
pivpn add
Enter a name for the client (e.g., phone or laptop) and a password. PiVPN will generate a .ovpn configuration file in the /home/pi/ovpns directory. This file is your key to connecting a device to the VPN, so keep it secure.
To transfer the .ovpn file to your device, use a tool like FileZilla (SFTP) or WinSCP. Connect to your Pi’s static IP with username pi and your password, then download the file from /home/pi/ovpns. Alternatively, use a USB drive to copy the file manually. Repeat this process for each device you want to connect.
Installing OpenVPN Client Software
To use the .ovpn file, install OpenVPN client software on your device:
- Windows/Mac: Download OpenVPN Connect from the OpenVPN website. Import the
.ovpnfile and enter the password when prompted. - iOS/Android: Install the OpenVPN Connect app from the App Store or Google Play. Import the
.ovpnfile via email, cloud storage, or direct transfer, then enter the password. - Linux: Install OpenVPN with
sudo apt install openvpn, copy the.ovpnfile to/etc/openvpn/, and connect withsudo openvpn filename.ovpn.
Once connected, your device’s internet traffic will route through your Raspberry Pi VPN, keeping it encrypted and private. Test the connection by visiting a site like whatismyipaddress.com—your IP should match your home network’s public IP.
Managing and Maintaining Your VPN
Your VPN is now live, but like any good project, it needs a little upkeep to stay secure and reliable. PiVPN makes management easy with simple commands, and a few best practices will keep your server humming along.
To add new clients, use pivpn add as described above. To remove a client (e.g., if a device is lost), run:
pivpn revoke
Select the client name from the list to disable its access. To see all connected devices, use:
pivpn list
For security, keep your Pi’s software updated with sudo apt update && sudo apt upgrade -y monthly. If you enabled unattended upgrades during PiVPN setup, security patches apply automatically. Also, monitor your dynamic DNS service to ensure your hostname points to your current public IP.
If you run into issues, check the OpenVPN logs at /var/log/openvpn.log for clues. Common problems include incorrect port forwarding or a dynamic IP change. Restarting the Pi with sudo reboot often resolves minor glitches.
Troubleshooting Common Issues
Even with PiVPN’s simplicity, you might hit a snag. Don’t worry—most issues have easy fixes. Here are a few common problems and solutions to keep your VPN running smoothly.
If you can’t connect remotely, double-check your port forwarding settings. Ensure port 1194 (UDP) is forwarded to your Pi’s static IP. Also, verify your public IP or dynamic DNS hostname is correct. If your ISP changes your public IP, update your DNS service or .ovpn files with the new address.
Slow VPN speeds could stem from an older Pi model or a weak internet connection. A Raspberry Pi 4 or 5 handles multiple connections better than a Pi 3. If speeds are still low, try switching to WireGuard by reinstalling PiVPN—it’s lighter and faster than OpenVPN.
If a client fails to connect, ensure the .ovpn file and password are correct. Regenerate the client profile with pivpn add if you suspect file corruption. For persistent issues, consult online forums like the Raspberry Pi Forums or PiVPN’s GitHub for community support.
Wrapping Up
Congratulations—you’ve turned your Raspberry Pi into a VPN server! With PiVPN, you’ve created a secure, private tunnel to your home network, letting you browse safely and access files from anywhere. It’s like having a personal bodyguard for your internet traffic, all for the cost of a $35 Pi and a bit of setup time.
Keep your VPN humming by updating your Pi regularly and managing client profiles with PiVPN’s simple commands. If you hit a bump, troubleshoot with the tips above or tap into the vibrant Raspberry Pi community for help. Now, go enjoy your secure browsing and take pride in your DIY tech skills!
More to Read:


Previous Posts: